Snag-App – Frequently Asked Questions
Adding a contact
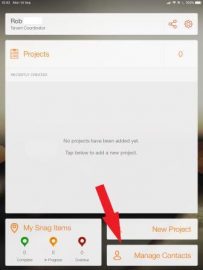
You can add a contact in two ways.
First, select the “Manage Contacts” button.
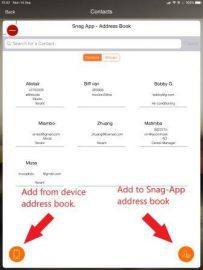
Now you can choose to add a contact directly from your device’s address book or you can create a contact in your Snag-App address book.
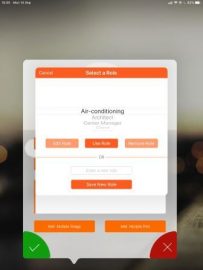
Adding a Role
A ”Role” refers to a particular discipline or responsibility within a project such as a plumber, electrician, tiler, Builder etc.
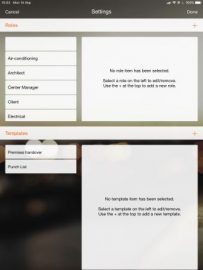
The app comes with standard roles already included however these can be modified as required.
Simply select the settings cog at the top right-hand corner of the screen and you will be able to edit all of the roles.
Creating a Group
Creating a group is particularly useful in a project where a number of defect list/Punch list notes or punch lists are created. This makes it easier and less work for the creator of the Punch lists as a group can simply be selected and it will be automatically distributed to the people or contacts contained within that group.
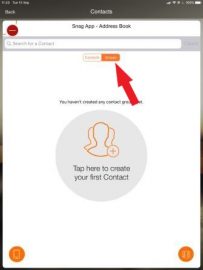
Select the “Manage Contacts” button on the bottom right-hand corner of the main screen.
Select the “Groups” button as indicated below. Please note that the “Add First Contact” button may not be shown if you have previously added contacts instead of this will show your existing contacts.
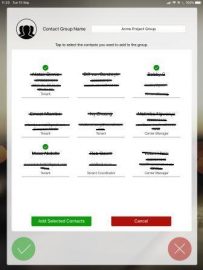
Next, choose a group name and insert it into the text box at the top of the screen,
Then tap on whichever contacts you wish to include in the group and a little green checkmark will appear above each selected contact. (You can unselect a contact by tapping on that contact again and the checkmark will disappear.
Select the “Add selected contacts” button and those contacts not included in the group will disappear from the screen.
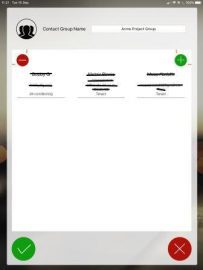
Confirm your selection by selecting the Green checkbox circle on the bottom left of the screen and your new “Group” will be saved.
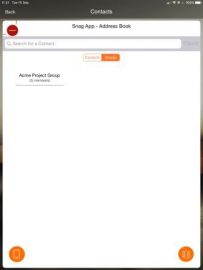
You can simply Select this “Group” when creating your next Punch- list and it will automatically be inserted.
Can I allocate a particular defect list/Punch list item to a specific trade, contractor or profession such as a plumber, electrician, painter or engineer?
Yes you can. We call these “roles” which describe the trade or profession of the person that is responsible for addressing the defect list/Punch list item. The application comes with a number of standard roles which you can edit, delete or add to as you please.
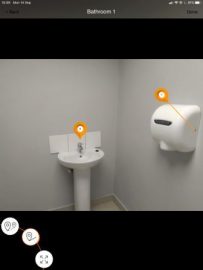
Can I allocate a number of defect list/Punch list items to a single pin?
Yes you can.
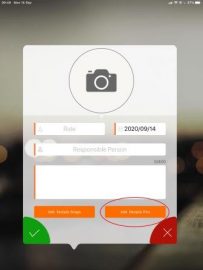
This is particularly useful in confined areas such as a bathroom where you may have a number of defect list/Punch list items but the area on the reference image does not allow for a lot of pins. In such a case you would drop a single pin and then select the “add multiple Snags “ button which will allow you to take a number of additional images of different items. These images will then be included under that single pin.

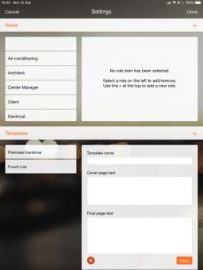
Can I create a template?
Yes you can.
However, this is limited to the Text on the front page of the final PDF generator document as well as the last page where the signatures are shown.
The application comes with two templates included.
The first is for a premises handover which is useful to a landlord or a renter when taking possession of or handing over a premises and is already configured in such a way so as to include all of the necessary clauses.
The second is a standard punch list template.
Simply select the settings cog at the top right-hand corner of the screen and you will be able to edit your templates.
Can I delete a defect list/Punch list item?
Yes you can, just select the pin and cick on the trash can.
Can I email my punch list directly from the app?
Yes you can. Once you have completed the Punch list you can email it directly from your device and all participants will receive the document on PDF format within minutes.
Can I allocate the same defect list/Punch list item to different locations?
Yes you can.
Select the “Add multiple pins” button and then simply tap on the reference image where ever you have the same defect list/Punch list (An example may be, lights not functioning in the following locations).
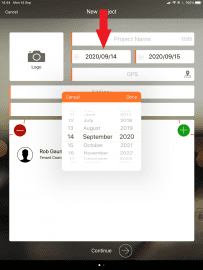
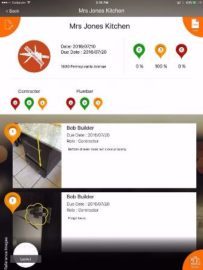
How do I set dates for completion?
Select the start date on the left and then select your expected completion date on the right.
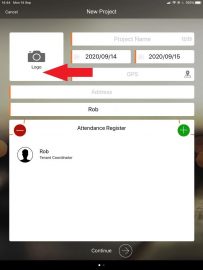
How do I insert my project logo?
Select the “Logo” button as indicated an choose a logo from your Gallery or album.
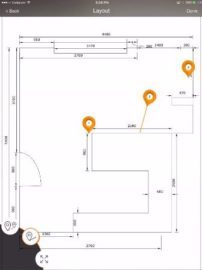
How do I extend a Pin?
Select the extend button at the bottom of the page and drag it with your finger to the required location.

How do I move a Pin?
Select the move button at the bottom of the page and drag it with your finger to the required location.

Is there a limit to the amount of punch list items I can do within one punch list?
No limit as long as you have the paid for version.
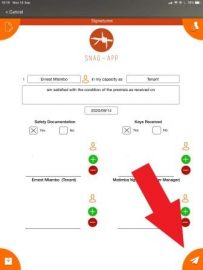
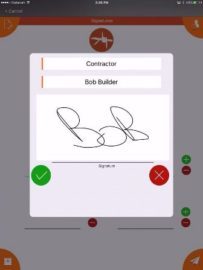
Is it possible to sign or add a signature on the app?
Yes absolutely.
The app allows for you and anybody else who is present to sign for the document and for it to be immediately converted to PDF and emailed. No more waiting to get back to the office to print the document out and then emailing it to somebody to sign and return to you.
Is it possible to use my app when I do not have data or Wifi coverage?
Yes the app can be used in airplane mode if needs be, the only difference being that you could not email the document to participants without having either data or Wi-Fi coverage.
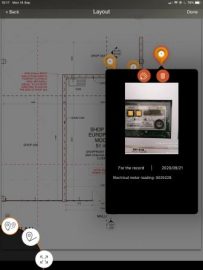
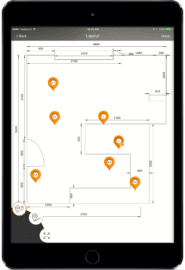
What is a pin?
A pin is a marker which shows the position of a defect list/Punch list item on a reference image. Each pin has a number and that number relates to an image describing what the defect is and who is responsible for it’s resolution.
![]()
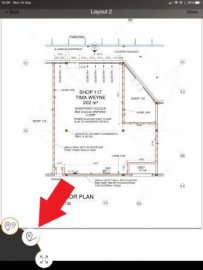
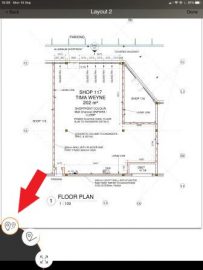
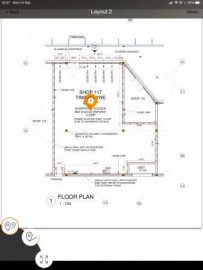
What is a reference image and how do I use it?
In simple terms a reference image is a representation of an item or area that is being audited for defect list/Punch list items and through the use of “Pins” it shows overall view of where all of the defect list/Punch list items are positioned. This makes the defect much easier to find.
A reference image is a picture, diagram, or plan upon which you will position Pins which shows the exact position of the defect list/Punch list items. It is possible to have a number of reference images, for example, you may have a reference image for each room in a home which you are creating a punch list for or alternatively you may have an overall plan of the entire home and you place pins in the various rooms on a single plan.
You could also for example have a picture of a bathroom and use that as your reference image in order to indicate where the defect list/Punch list items are.
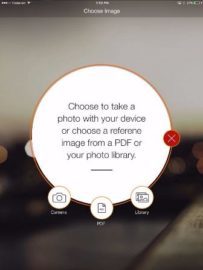
You also have the option of inserting a reference image directly off your cloud storage by selecting the cloud icon on your reference image Screen. we would suggest that the reference image be in a PDF format and that ideally it should be saved on the cloud in portrait orientation.
What is a Snag?
A snag list, which is also sometimes referred to as a snagging report, is a list of all the items that need to be completed, fixed, re-done, or addressed before a construction project is finished. You may have also heard this referred to a punch list. … It’s a very important step in the construction project process.
What is the difference between the free version and the paid full version?
The free version allows full functionality but only five punch list items. The full version allows for unlimited punch list items as well as unlimited punch lists.
Who uses app?
Anybody from architects to engineers to builders and even homeowners.
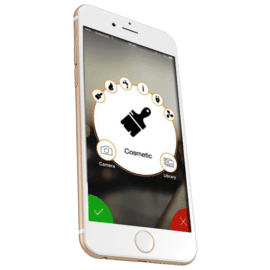
What are the Icons for on the capture page?
The Icons represent various disciplines in the building environment and can be used instead of taking a photo or using an image out of your album on your device.
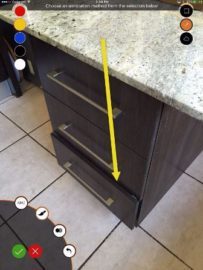
Is it possible to take a photo of a defect list/Punch list item and can it be marked up with an arrow line etc?
Yes it is. Once you have taken a photo you can drag an arrow to indicate a particular item of interest, place a circle around it or a box or even add text to the photo. This can be done in a number of colours as well.